Call me old fashioned, but I just can’t buy into the whole photo book craze. Sure they’re a rather convenient way to document your travel memories, but where the heck do you put all of those mementoes like boarding passes and museum ticket stubs? And how would you show off that cool travel-themed scrapbook paper you sourced, or get to bust out some cute Eiffel-tower shaped stickers?
Along with collecting shot glasses from every new place I visit, my other travel tradition is to document my adventures by travel scrapbooking, to the point where I now have a stack of them that takes up half a shelving unit—and I love every minute of it. Here are some tricks I’ve picked up along the way about how to make a good travel scrapbook.
Scrapbooking tools: What you’ll need
While some may prefer a more compact photo scrapbook, the most common size is 12 x 12 which fits four or five 4×6 photos per page. Make sure you have the following scrapbooking tools on hand before you get crafting:
- A sharpie for writing bold titles, and a pen for more detailed captions.
- A three-ring binder
- Plastic page protectors
- 12x 12 scrapbook paper
– I like to do each place in the same colour so it’s obvious when you’re moving on to a new place. For example, do all of my Switzerland pictures on red paper, then change to yellow for the Netherlands section of the scrapbook.
- Travel stickers
- Glue
- Scissors
- Photos (duh!)
- Wine and good music to get you through the hours-worth of scrapbooking
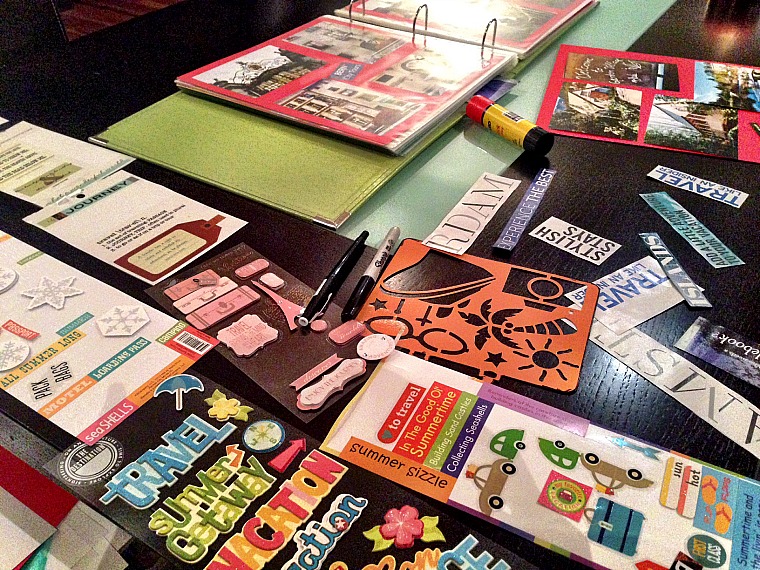
Here are my all-time favourite travel scrapbooking accessories:
How to make a travel scrapbook: Organization is key
If you only learn one thing from this article let it be this: it pays to plan ahead. I used to just scroll through my photos, pick my favourites, then run and print them off. Want to know why that’s a terrible idea? Because you end up printing more than you need (hence wasting money) and spend way too much time trying to figure out how to group them. Oh, and you’ll probably end up with holes to fill which means more time and money spent printing them off.
Instead, get the hard stuff out of the way first.
- Edit. I use Lightroom to edit all of my photos, and it’s amazing how much better they look with just a little bit of tweaking. If that’s above your skill set, there’s a free online program called PicMonkey that works well for basic edits.
- Decide which photos you want to include in your vacation scrapbook, then determine which ones you’ll use on each page. I usually do four per page, or two/three if I’m also including a brochure or ticket stubs. It’s also important to consider scrapbook layouts, as a 12×12 page using 4×6 photos can only hold the following:
- 4 or 5 horizontal
- 3 horizontal, 1 vertical
- 2 horizontal, 2 vertical
- 1 horizontal, 2 vertical
Keep in mind you may want to print some amazing photos off as larger 5x7s, which will affect your layout.
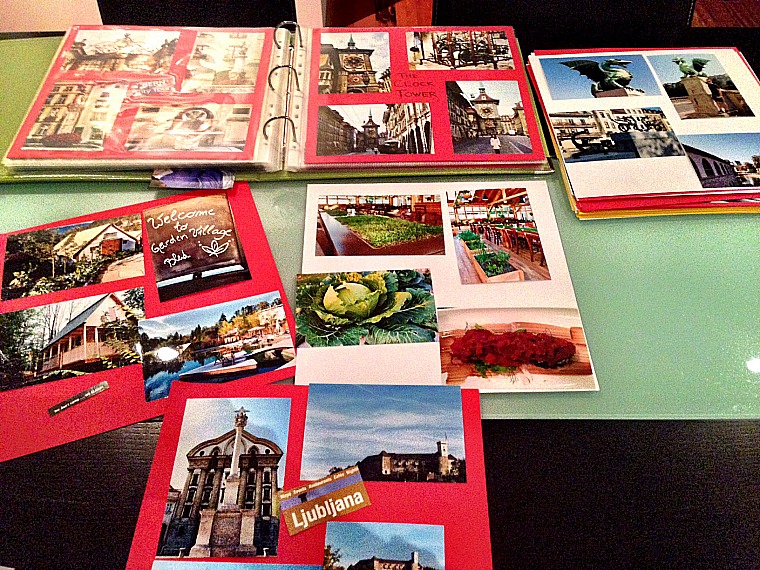
3) After your photos are printed (I find Costco has the best prices for that), clear off a large workspace where you can leave everything lying around for a few days, then lay out each page on the scrapbooking paper. This is the time where you also decide which stickers/cut-outs/memorabilia will go where.
4) Get gluing!
Travel scrapbook accessories: How to save money
Making a travel scrapbook can be surprisingly expensive once you pay to develop all the photos and get materials. Fortunately, there are a few ways to save money. The best way? Couponing! Personally, I find Michael’s is typically overpriced, but they do seem to always have a ‘40% off one item coupon’ floating around which can mean big savings if you buy your $40 binder there.
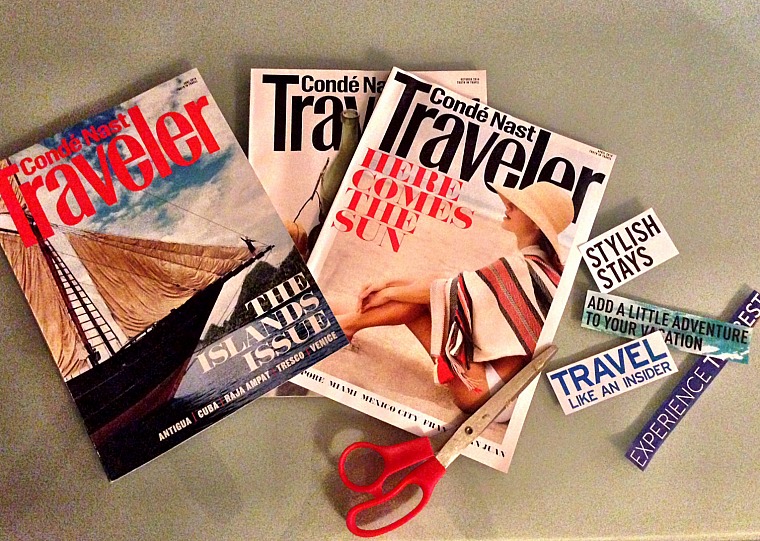
- Raid your magazine collection (travel magazines like AFAR or Conde Nast Traveler are best) and cut out words or pictures that apply to your scrapbook. This is another reason I save all of the brochures I pick up along my trip, as I regularly end up hacking them up.
- Amazon is the perfect place to scoop up packages of page protectors
, as well as travel themed scrapbook paper and stickers
.
- To save paper, my top tip is to use both sides. Not only does this mean you’ll need half as much, but it also allows you to cram more pages into each book which saves money on binders.
- Finally, printing off the photos themselves will be your biggest expense, so put your Costco membership to use or sign up for e-mails from companies like Shutterfly. They give 50 free prints to new subscribers, regularly offer steep discounts and even send out bonuses such as 101 prints free.
YOU MIGHT ALSO ENJOY:
How to keep your SD card- and memories!- safe
The ultimate list of little-known travel hacks
SHARE THE PINSPIRATION!
This post may contain affiliate links, which Globe Guide receives compensation for at no additional cost to you.
Pingback: The best Instagram hashtags for Canada travel photos
thanks for the suggestions, especially about being more strategic on how many photos to print out! one thing I do now is keep a daily journal of where I am – what I see and ate, how I felt at the time. this means I can order the photos chronologically and write titles that are more descriptive.
That’s awesome! I really struggle with that when I get home, trying to remember exactly where I took each photo (i.e. if I visit three different beaches). That’s where Google Image Search comes in handy 🙂
I get my ideas from the internet and Google for page ideas, what I do is print a 4 by 6 or larger and then print 4 ,by 4, this way I can put alot of person pix on one page
That’s lots of pics
___123___How to make a travel scrapbook – Globe Guide___123___
great organizational tips! I have been scrapping 14 years and have learned through trial and error the methods you have suggested! I love to use maps and brochures along with the pics!! If I can,t remember the name of a place I can get out my scrapbook and view that page as well as get info. on it!! I also love pockets and plan to order more from Amazon!!!
Thanks Donna! Your point about remembering where places are is totally why I started scrapbooking (and then eventually blogging!) in the first place 🙂
I also take a pic of my xcursion ticket or write it and take a pic if it this way I know where pix was taken at hope that helps
I also take a pic of my xcursion ticket or write it and take a pic if it this way I know where pix was taken at hope that helps
I love travel scrapbooking too and I also journal as well. I find it best to do it electronically rather than pasting a lot of little things to a page which in about 5 years will end up on the floor when you open the scrapbook even with page covers. If you like buying the stickers etc then scan them and the background paper into your computer. You can even go to the trouble of designing three or 4 pages and scan them in without the pictures. Then go in and add your pictures, and in my case journal entries, onto each page and save them with a new name so you can reuse your design over again. I use about three or 4 page designs so the book has some consistency. The process might take a bit more effort but in the end you have a digital file to save and take it to a good printer and have it printed and placed in the page covers and three ring binder. The cost of printing may be an additional cost but you will have all your scraping supplies for another project and a project that is shareable and will last forever.
I love your idea, I must give it a try. I buy most of my embellishments at Dollarama, this saves hundreds of dollars. I highlight each picture which really makes the subject matter pop. I also use letter size paper in page protectors all filed by category rather than chronological order, it makes it much easier to locate pictures.
I love to collect postcards as they can be scrapbooked with my many photos sometimes describing where I was and can in a way confirm I was there.
My true L💛VE to collect is cloth patches and then sew them onto camp blankets or a throw blanket and my bucket list trip to UK is going to be a wall hanging.
There is also a way now to iron your photo onto a patch to include in your memories.
What a fun idea Jen, love that!